
Update (June 2020): I have had quite a few requests for the CAD model of this machine, since I have been using it for a few years now and it has proven to be a very functional design I have made the 3D model available for purchase on my Etsy store.
The model contains all the critical parts required to build the machine identical to mine and you are free to modify it to your requirements. I think the price is quite low considering the amount of work that went into the design and any profit I make will help fund my website and future projects.
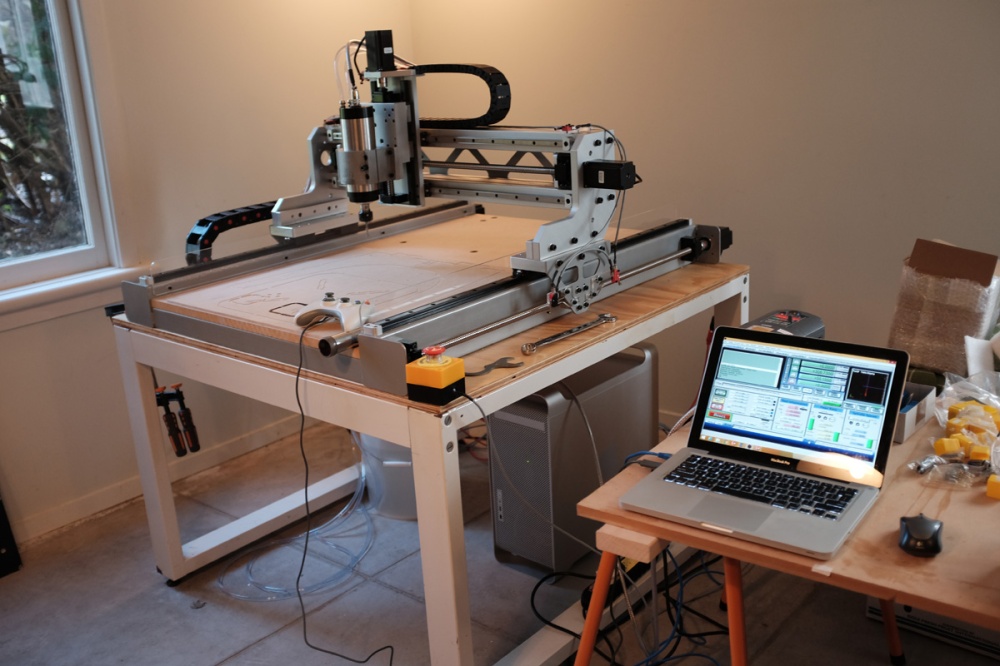
This is a short blog post documenting the final stages of my custom CNC router project. The main design and construction of this machine was completed in roughly 6 months and the youtube clip below shows some of the first movements I got from the machine.
I am running the machine with Mach 3 control software via the Ethernet SmoothStepper (ESS) board and Gecko G540 4-axis Stepper driver. I highly recommend the ESS board as it allows you to outsource the stepper pulse stream computation to a dedicated processor, rather than the traditional setup where pulses are output directly from the computer via parallel port. By negating the need for an archaic parallel port it also allows the whole machine to be run directly from my laptop via ethernet cable. I’m also using an Xbox controller as a remote control for the machine, this greatly aids my job setup process and is made possible by a plugin which is available from the Newfangled Solutions under the plugins page.
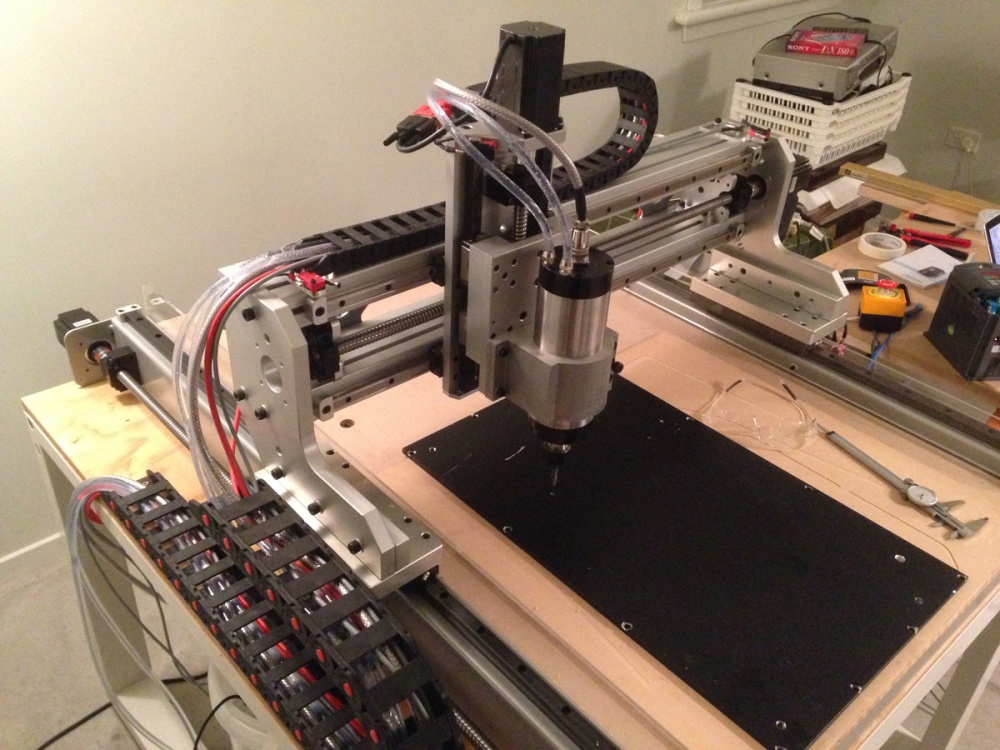
The video below shows a basic helical milling sequence which is cutting a grid of holes that will be used for workpiece fixturing.
The MDF bed was then removed and M8 threaded t-nuts inserted from the underside.
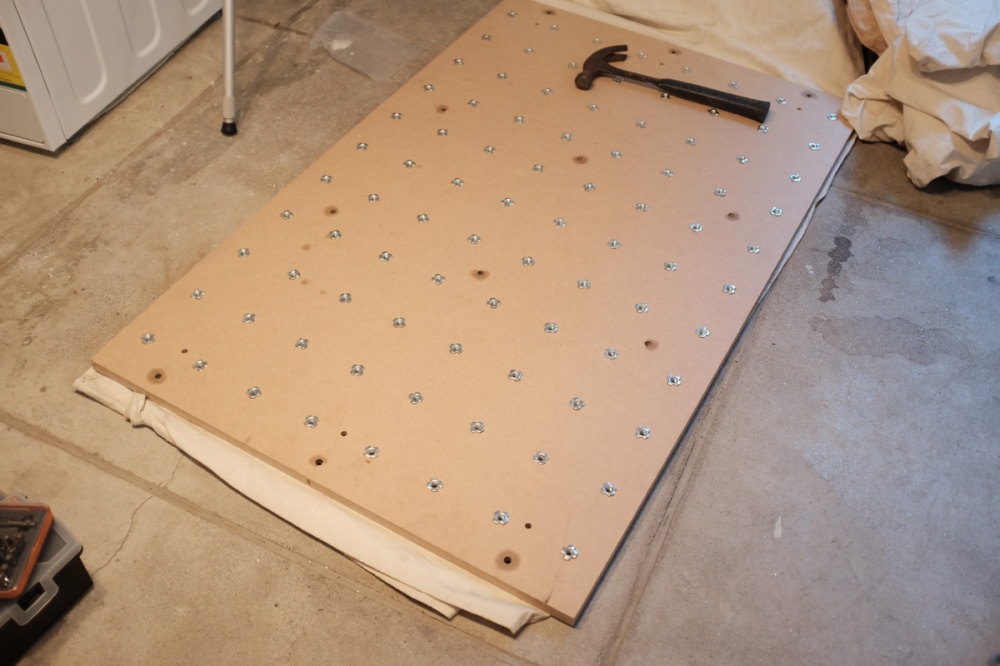
I have pre-cut 4-6mm MDF sheet with a grid of holes in the same arrangement as my bed, this allows me to bolt clamps and fixtures through the sacrificial sheet without having to cut the MDF to the exact size of each job. This sacrificial layer ensures a clean cut through my workpiece without damaging the machine bed.
Machine Specifications
- Cut Size: 850 mm x 550 mm (approx)
- 2.2 kW water cooled spindle
- 15 mm THK linear slides on all axes (X,Y,Z)
- 16 mm ballscrews on all axes (dual screws on Y axis)
- Nema 23 stepper motors
- Gecko G540 4-axis stepper driver
- Ethernet SmoothStepper Board
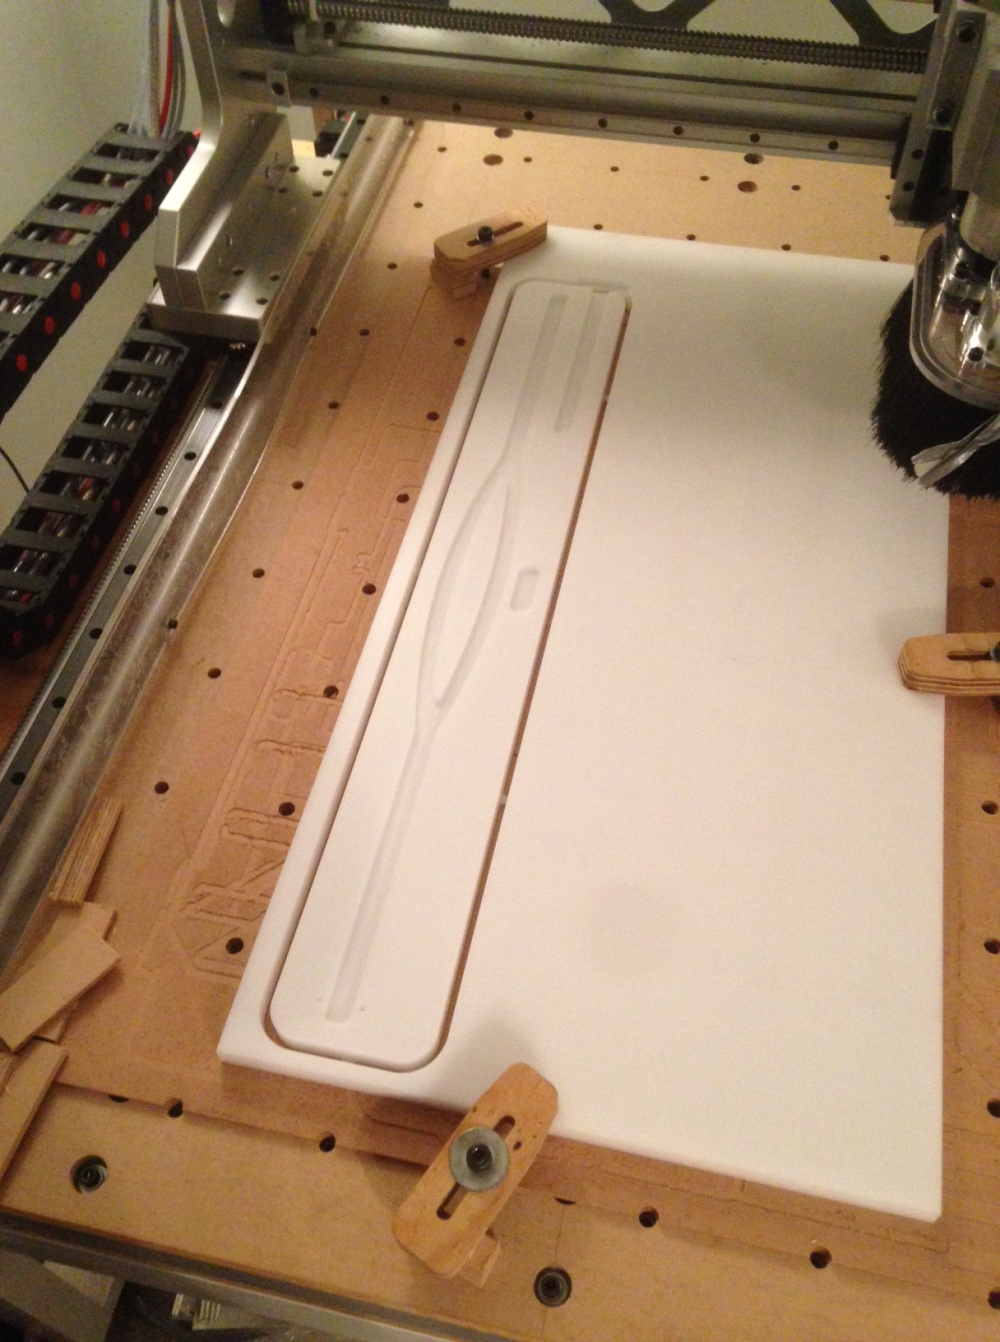
Although the machine is capable, I am yet to try any full 3D machining programs. I have run many 2D/2.5D CAM programs produced using ESTLCam, which is a surprisingly simple, functional and cheap (almost free) piece of software, which can be found at www.estlcam.com. Most of my projects so far have been in wood or Acetal, I plan on cutting 6061 aluminium plate with this machine and will dedicate a post to this topic at a later date.
If you would like to learn more about the design and development of this machine, the complete build log is on the CNC Zone Forum. If you haven’t already seen them, please also visit my website for the other posts in the DIY CNC Router Series.
In closing, I am very happy with how this machine turned out and have learnt a great deal along the way, which was one of the main goals of this project.

Hi Jeremy,
I got fascinated by CNC machines and are considering building one myself though I am completely blank with respect to this topic. I spent many hours studying theory, design concepts etc. I am very enthusiastic about your design (lay-out and robustness). Your descriptions and photos give a good understanding of all the items. Was a pleasure to read it!
PS I locally found 24×24 mm T-slotted aluminium extrusion for (I think) reasonable prices (€ 15-20 for 75 cm).
LikeLike
Hi Hans, I’m glad you enjoyed. Yes it seems extrusion is available relatively cheaply everywhere but NZ… Keep me updated with your build!
LikeLike
Hi Jeremy,
AlexDoran on mycncuk is building a ‘copy’ of your design right now, so I am watching how he gets on with it. I have read your postings and blogs with interest.
Could I ask a few questions please!
Is there anything about your machine design that you wish you’d done differently?
Having access to pro cnc machines obviously made life a lot easier for you. How feasible would the build have been if you just had, say a pillar drill, or small hobby mill? You have some very nicely milled parts and obviously all the drilled and tapped holes are very accurately done by using a CNC to do it!
I noticed that you bolted the x rails straight onto your steel box bed/frame. Didn’t it need any machining to get dead flat? I’ve seen a few builds where the mounting faces get faced off to ensure perfect flatness across the frame.
Thanks for posting the build!
LikeLike
Hi Richard,
Thanks for your comment, cool to know that someone is elaborating on my design, I will check out the forum thread.
I am pretty happy with my machine, it is set up to cut wood and plastics, which is does very well. I have come to realise that cutting aluminium requires a few features to make things efficient. A couple of things I need to improve is the coolant/air blast setup and also an MDF table is not ideal when using coolant. On the other hand, the current setup (threaded inserts, 4mm thin sacrificial MDF with pre-cut holes etc..) is very efficient for cutting wood.
I think building a machine like this is definitely possible with a small hobby mill. Especially if you are in a country where purchasing precision faced aluminium plate is cost effective.
For the side rails of my bed I used 4mm thick rectangular steel tube, this thickness is overkill but I wanted to do everything I could to avoid warping from the welding process. This worked in my favour and the top sides were fairly flat and parallel after welding. Facing the tops would have been a good option, but I didn’t have a machine large enough to fit the whole bed into. I had planned on shimming the rails, but it wasn’t really necessary, so I didn’t bother.
One thing that didn’t turn out that great was the cross bars on the bed, they weren’t all at even heights after welding, so my bed is not perfectly flat, I could carefully place shims under the bed to fix this, but +- 1 mm in the bed flatness hasn’t really bothered me for the jobs i’ve done so far.
I also think I would have invested in better quality ballscrews, i’ve never been quite happy with the ones I got, the x axis screw in particular I feel has some backlash.
I hope this helps.
Cheers
Jeremy
LikeLike
Hi Jeremy,
I would like to try and build a machine based on your design too! I don’t have the CNC kit, but I can weld and I do have a manual knee mill!
If you are interested in sharing the CAD files…
Aluminium profile is probably cheaper here in the UK, so that may be a better choice for the base.
LikeLike
I have updated this post to include a download for the CAD files in Fusion 360.
Keep me updated on how you go with the build.
Cheers
Jeremy
LikeLike
Thanks Jeremy, that’s very decent of you! It will also be a good excuse for me to learn Fusion 360…
Do you have any measurements for your machines accuracy, repeat-ability and structural rigidity?
LikeLike
Hi Jeremy, i just want to ask how strong your nemas are ? (Nm)
LikeLike
I think they are “Low Inductance 320 oz-in”
LikeLike
Hello Jeremy, your machine looks really good, so good that it doesn’t look like a DIY haha, I’m thinking of purchasing your CAD model but I was wondering, what version of SolidWorks did you use? Just to make sure I won’t have any compatibility issues.
LikeLike
Hello Jeremy, I’ve been meaning to buy your CAD files from Etsy but I was wondering, what’s the SolidWorks version you used? Just to make sure I won’t have any compatibility issues, or if you have a Fusion 360 version for sale that would also work for me.
LikeLike
Hi Abimael,
The model was created in SW 2014.
Cheers,
Jeremy
LikeLike
How much would you say this build has cost you in all parts? Just an estimate.
P.S it looks great, and performance-wise seems awesome.
LikeLike
Firstly:
Thank you for replying to my comment about the open-loop stepper performance! Your machine is so solid looking, not to mention, it looks esthetically pleasant!
Also:
I wanted to say you audio designs / builds look just as awesome! I am also an audio Engineer/ enthusiast… Ive owned my recording studio for about 15 years now; However i have all my equipment covered with dust blankets until I finish this CNC machine project. (I’m about $2500 into parts for it, and I think I have about another $1000 to go; Spent way more than necessary due to buying wrong size parts & not having access to a machine shop… Lessons learned!!! 😂)
Cheers!
Rob
LikeLiked by 1 person
Does the CNC Router plans come with a Bill of Materials, and possible suppliers? Also, the CNC looks very strong. I would consider using cutting fluid, and possibly milling steel with it..
LikeLike
Hi Norman,
I am not offering “plans” for sale. My Etsy listing is only for a 3D model of my machine which can be used “as-is” or as a starting point to modify into your own custom machine. My machine was built almost 10 years ago so any supplier list/BOM would be outdated.
Cheers,
Jeremy
LikeLike